How to Get Google Assistant on Android 5.0 Without Rooting
As highlighted in Google I/O 2017, Google’s new Assistant is smarter, always ahead, more personal, and plays well with other apps and gadgets. Almost every Android user now is looking to get his hands on the new Google Assistant, unfortunately, however, it is only available on phones running Android 6.0 or above versions of Android.
However, this doesn’t mean there isn’t any way to get it on your phone running Android Lollipop. As a matter of fact, you can easily get it without even rooting your device.
In this post, I’ll show you two ways to get Google Assistant on your Android Lollipop device.
Read Also: Locked Out of Your Android Device? Here’s What You Can Do
Method 1: Install from Google Assistant APK file
You can install Google Assistant from its APK file and configure it to replace Google Now. To do so, you must enable downloads from unknown sources in your phone:
- Go to phone Settings > Security.
- Scroll down and toggle on Unknown sources.


This will allow you to install apps from other sources besides Google Play Store. Now download the Google Assistant APK file on your Android phone and tap the Install button to install it.
Now you need to enable it to recognize your voice and replace Google Now for assistance, here’s how:
- In Google Assistant app, move to the Your Stuff section.
- Here tap on Add Reminder, and then Get Started to help Google Assistant recognize your voice. You’ll have to say OK Google three times to do this.

Now you need to make sure your phone’s Voice input is configured to accept hotwords and interact properly:
- Go to phone Settings > Language & input.
- Tap on Voice input and ensure Enhanced Google Services is selected.

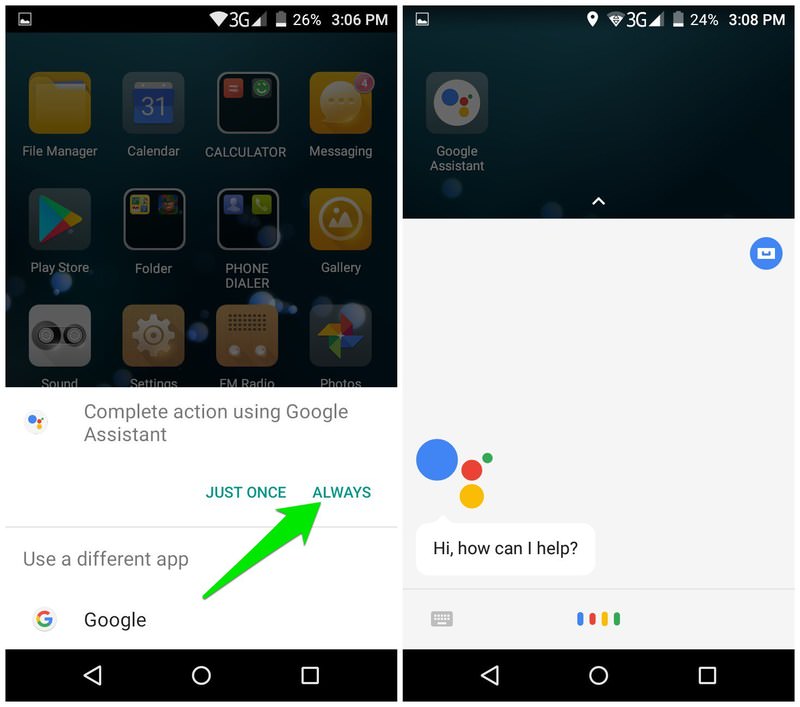
Now that’s done, long press the home button or swipe upward from it (depends on your phone) and tap on Always when asked to set Google Assistant as default app. Google Assistant will open up and you are ready to play around with it.
Method 2: Use Nova Launcher
Alternatively, you can use a good Android Launcher with add activity shortcut support to add a shortcut for Google Assistant on the Home screen. For this trick, Nova Launcher works fine. Although make sure Google App is updated to the latest version.
- Install Nova Launcher and set it as default home screen. You can press the home button in the Nova Launcher app to set it as default.
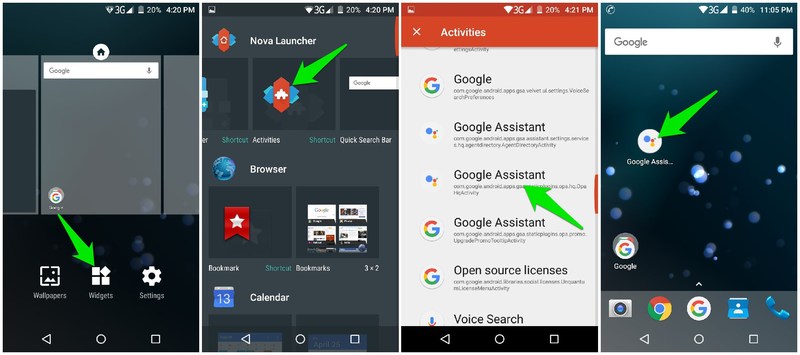
- Now tap and hold on an empty space on the home screen and select Widgets .
- Tap and hold on Activities widget and drop it on the home screen.
- You’ll be asked to select an activity from the list. Here scroll down and tap on Google App to open its activities.
- You need to select the Google Assistant option with the following text in the description:
google.android.apps.gsa.staticplugins.opa.hq.OpaHqActivity
This will add Google Assistant icon on the home screen. You can tap on it to open the Google Assistant and configure it like we did in the above method.
Bonus
It isn’t necessary to get Google Assistant app if you just want to see how it feels. Simply install Google Allo messaging app and you will find the Google Assistant right inside it. Google Assistant is well integrated in the Google Allo app, but it will not offer system wide services.
Round up
Google Assistant is probably the best virtual assistant available in the market right now. Being stuck in an older version of Android shouldn’t stop you from tasting the best. The first method is still the best for installing Google Assistant on a Lollipop device. Although if it didn’t work for you or you are already an avid user of Nova launcher or a similar one, then the second option may be better for you.
Read Also: Top 3 Android Email Clients