20 Adobe Lightroom Tutorials for Novice Photographers
Adobe Lightroom is one of the most popular photo editing and image manipulation tools. The tool is particularly a favorite among photographers as it offers all the they need to clean up and process images – turning a digital photo from a RAW image to the beautiful framed picture on your wall.
Read Also: Fotor Free Photo Editor (Review)
In this post, I’m going to share with you 20 Adobe Lightroom photo editing tutorials for newbie photographers that include effects like adding a retro mood to your pictures, placing watermark on an image, editing portraits, creating tilt-shift effect etc. Check out the following list to know more.
Creative color adjustments in Adobe Lightroom
By adjusting light and colors of a photo you can achieve significant results. If you’re wondering how all famous photographers get a soft warm look for the photos, follow this easy Lightroom tutorial.

Create vintage effect in Lightroom
If you need some vintage effect for travel landscape pictures, this tutorial is here to help you. This retro look can be achieved by moving a few sliders in Lightroom.

How to get an HDR look
HDR or High Dynamic Range is a popular photohraphy technique which you create by combining a few the same images taken with different exposures. This Lightroom tutorial shares an easier way to add HRD look to your image.

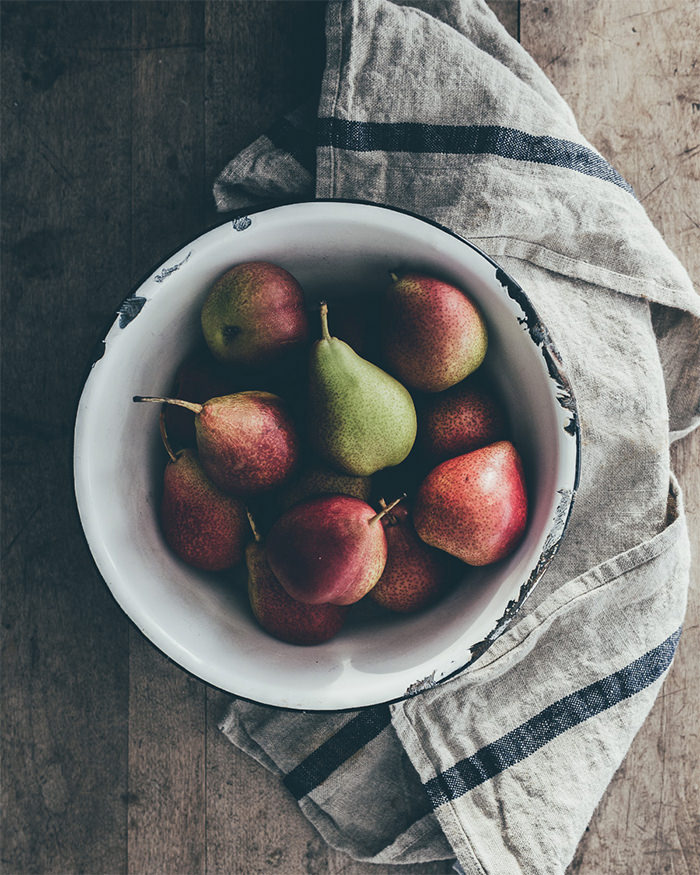
Create a beautiful faded effect
With this tutorial you will learn to manipulate light and colors of a photo to achieve significant results. This is how professional photographers get a soft warm look for their photos.

Retro photo effect in Lightroom
Retro photo effects are extremely popular. The best thing is that this effect can be utilised for almost any kind of photo. Use this quick Lightroom guide to edit a couple of photos in a retro way.

Create a soft pastel effect
Follow this Lightroom tutorial to achieve the same nice pastel look for your own images. This effect would be suitable for spring photos with lots of green.

How to get creamy skin tones in Lightroom
If you are looking for a way to add creamy dreamy effect to your portrait photos, search no more. This tutorial requires changing a few settings in Lightroom.

Create a Lomo effect
This Lightroom tutorial was written for lomography fans out there. It will help you to add a vintage bold vignette style for your photos.

Make black and white photos
This easy video tutorial will help you to turn a boring black and white shot into a bold amazing image with Lightroom. Just follow the instructions step-by-step.

Lightroom urban photo edit
This flawless nice photo effect could be added to your images with just a few clicks of your mouse. You could also download this Lightroom preset and speed up your workflow.

Create a vintage monochrome look
If you want to enhance a usual monochromatic photo, use this tutorial to get vintage warm photo effect. It looks like a sepia tone, a well-known retro photo effect.

Edit beach portraits in Lightroom
Beach photography is quite challenging, because its complicated to set proper exposure for the sky, water, and any other subjects within the shot. This Lightroom tutorial will help you to edit beach photo with ease.

4 easy steps for creating a Watermark
Watermark is the best way possible to protect your photography from theft online. This guide includes 4 different ways to set up and use watermark for your images.

Use your camera’s color profiles in Lightroom
Your camera has a few different profiles, such as Standard, Portrait, and Landscape. Choosing a proper profile for a certain picture can dramatical improve its look. This is a simple guide explaining when and why to use camera profiles.

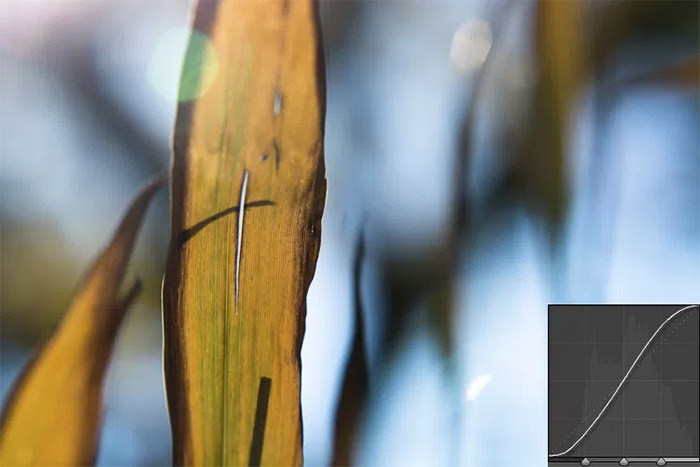
Understanding the Lightroom tone curve
In this short tutorial you’ll get to know how to use one of the most powerful Lightroom tools, the tone curves. The Tone Curves tool allows you to edit lightness and darkness of different parts of a particular image.
Create a vintage film effect
This Lightroom tutorial will walk you through the process of creating film-inspired vintage effect in Lightroom. You’ll be using Basic, Split Toning, and Tone Curves tabs of settings to achieve this look for your image.

How to post-process hard light & overwhelming tones
Sometimes the photo turned out too dark. It has hard shadows, distracting backgrounds, and strong colors, which could be easily changed in Lightroom. Follow this tutorial to get to know how to edit an underexposed shot.

Edit your photos like a pro in Lightroom
It’s a general tutorial where a photographer from Safer Skincare shares her Lightroom workflow routine. Here you’ll get to know how to add files in Lightroom, edit them, and save.

Create a tilt-shift effect
Originally, tilt-shift photography could be achieved with a tilt-shift lens. However, you can imitate this effect of selective focus in Lightroom by following this guide.

Dark and moody Lightroom edit
Here is one more general Lightroom tutorial showing you the process of editing an image from A to Z. Play around with light and shadows to enhance your photography.