How to Add Custom Code Snippets to Atom
It’s not a coincidence that Atom, the source code editor created by Github is popular in the web development community. It’s not only easily extensible with thousands of Atom Packages, and has a wide language support, but almost its every part is customizable by the user.
By leveraging Atom’s Snippets feature, you can make your coding workflow more productive, as by reusing recurring code snippets you can reduce the repetitive part of your work. In this post, I’ll show you how you can use Atom’s built-in code snippets, and create your own custom snippets.
Read Also: A Look Into Atom: Github’s New Code Editor
Use built-in code snippets
By default, Atom comes with built-in code snippets, each of which is bound to a scope belonging to a certain file type. For instance, if you are working on a file with .js extension, only snippets belonging to the JavaScript scope will be available for that file.
To see all available snippets for your current file type, hit Alt+Shift+S. If you choose a snippet from the drop-down list and click on it, Atom will insert the full snippet into your editor without any further hassle.
If you are already aware of the options, you don’t necessarily have to load the whole list. When you start to type, Atom pops an autocomplete results box up, that contains the available code snippets belonging to the certain scope and the string you’ve typed so far.
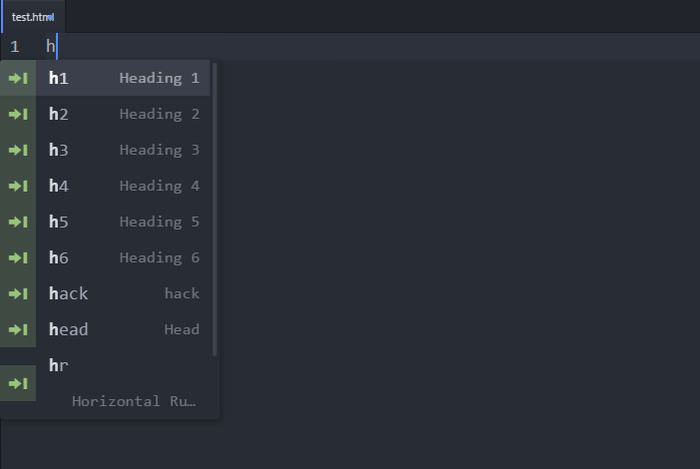
For example, if you type the h character into a .html file, a dropdown list with all built-in HTML snippets beginning with h will appear.
By clicking on any option, Atom will paste the full HTML tag (e.g. <h1></h1>), and position the cursor within the starting and closing tag.
If you don’t want to bother with the dropdown list, you can achieve the same result by typing h1, and hitting Tab or Enter — both of these keys insert the full code snippet belonging to the prefix of the snippet.
Read Also: 30 Useful Regex Code Snippets for Web Developers
Adding your custom code snippets
1. Find the configuration file
To add your own custom code snippets to Atom, first you need to find the configuration file called snippets.cson that is a CoffeeScript Object Notation file.
Click on the File > Snippets... menu in the top bar, and Atom will open the snippets.cson file to which you can add your own custom snippets.

2. Find the Right Scope
You will need four things in order to add your custom snippet:
- The name of the scope
- The name of the snippet
- The prefix that will function as the handle of the snippet
- The body of the snippet
The name, the prefix, and the body of the snippet (2-4) solely depends on you, however you must find the name of the scope (1) before adding your custom snippets.
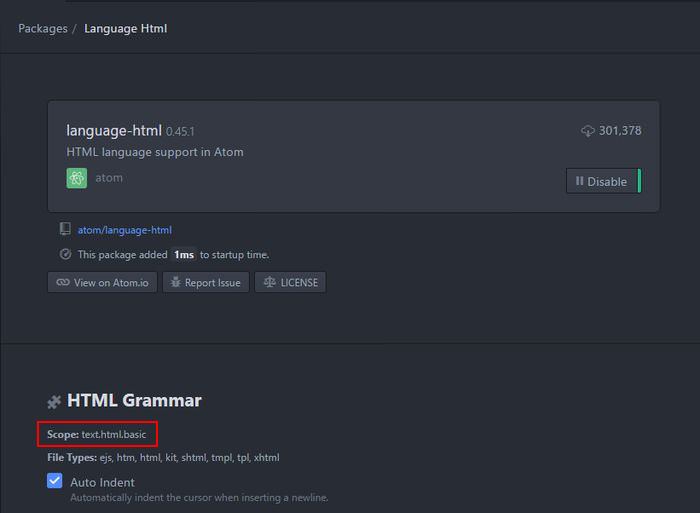
To find the scope you need, click on the File > Settings menu in the top menu bar, then find the Packages tab among the Settings. Here, run a search for the scope you need, for example if you want to add code snippets to the HTML language, type HTML into the search bar.
Click on the language support package of the chosen language, and open its own Settings. Among the Grammar settings, you can quickly find the name of the scope, as you can see on the screenshot below.
Here are some scopes you may want to use in your Atom projects:
- Plain Text:
.text.plain - HTML:
.text.html.basic - CSS:
.source.css - Sass:
.source.sass - LESS:
.source.css.less - JavaScript:
.source.js - PHP:
.text.html.php - Python:
.source.python - Java:
.source.java
Don’t forget that you will need to add a dot (.) in front of the name of the scope in order to use it in the snippets.cson file.
3. Create Single-Line Code Snippets
To create a single-line code snippet, you need to add the scope, the name, the prefix, and the body of the snippet to the snippets.cson file, using the following syntax:
'.text.html.basic':
    'Widget Title':
      'prefix': 'wti'
      'body': '<h4 class="widget-title"></h4>'
This example snippet adds a <h4> tag with the widget-title class to the HTML scope. You can add any other single-line code snippet to your Atom editor following this syntax.
After saving the configuration file, whenever you type the prefix & hit the Tab key, Atom will paste the belonging snippet body into your code editor. The name of the snippet (in the example Widget Title) will be displayed in the autocomplete results box.
4. Create Multi-Line Code Snippets
Multi-line code snippets use a little bit different syntax. You need to add the same data as for single-line snippets — the scope, the name, the prefix, and the body of the snippet.
What is different here is that you need to place the snippet body within a pair of """ (three double-quotes).
'.text.html.basic':
    'Image Link':
      'prefix': 'iml'
      'body': """
        <figure>
          <a href="" target="_blank">
            <img src="" width="" height="" alt="">
            </a>
        </figure>
        """
If you want to add more than one custom snippets to the same scope, add the name of the scope only once, then list the snippets one by one:
'.text.html.basic':
    'Widget Title':
      'prefix': 'wti'
      'body': '<h4 class="widget-title"></h4>'
    'Image Link':
      'prefix': 'iml'
      'body': """
        <figure>
          <a href="" target="_blank">
            <img src="" width="" height="" alt="">
          </a>
        </figure>
        """
5. Add Tab Stops
You can further facilitate the usage of your custom code snippets by adding tab stops to the snippet body. Tab stops indicate the spots where the user can navigate by using the Tab key. With tab stops you can save the time that in-text navigation requires.
You can add tab stops using the $1, $2, $3, ... syntax. Atom will position the cursor to the place it finds $1, then you can jump to $2 with the Tab key, then to $3, and so on.
'.text.html.basic':
    'Image Link':
      'prefix': 'iml'
      'body': """
        <figure>
          <a href="$1" target="_blank">
            <img src="$2" width="$3" height="$4" alt="$5">
            </a>
        </figure>
        """
6. Add Optional Parameters
Atom allows you to add extra information to your snippets by using optional parameters. This feature can be useful if someone else also uses your editor and you want to let them know the purpose of the snippet, or if you have so complicated custom snippets that you need to add notes to them.
The values of the optional parameters are displayed in the autocomplete results box that comes up when you begin to type a prefix. In the example below, I added a description & a More... link to the previous Widget Title custom snippet:
'.text.html.basic':
    'Widget Title':
      'prefix': 'wti'
      'body': '<h4 class="widget-title"></h4>'
      'description': 'You can add a widget title with this
          snippet to your sidebar widget.'
      'descriptionMoreURL': 'http://hongkiat.com'
When the user begins to type the prefix wti, the extra information (description + link) will be displayed at the bottom of the autocomplete results box. Have a look at the other optional parameters you can use to add extra information to your custom snippets.
